Hi there
this is the ultimate guide on how to install and connect an Epson printer with a wifi network. if you have just purchased an Epson printer or you have already installed a printer trying to print using wifi then this post would really help you sync the printer with wifi to print.
Table Of Contents
There are three ways you can connect the Epson printer with wifi.
- Manually use the printer panel to connect printer with wifi network
- download the driver on the computer and connect the printer to the wifi while installing the printer.
- WPS Method to Connect the printer to wireless
we will explain all 3 options in detail and guide the best possible way to make the connection happen. at any point, you can contact the support team for help. let us start with the manual method first.
Manually Connect Epson Printer to Wifi
Note – Press Ok and Enter to say if your Epson printer Don’t have the touchpad
Please Unbox the printer and connect all printer components as given in the manual like plugging the power cables and inserting the ink cartridge and making it print-ready.
- Turn on the printer and make sure the wifi device (Router/Extender) is on and working
- go to the printer panel in front and press the Home Key to louch the control panel


- use Navigation arrows to select Setup and ok
- find Network settings under setup and press Ok
- Select Wi-fi Setup and Enable the wifi on printer
- now printer will search with networks around it and present you with a list of available network


- select the name of your wifi that you want to connect with printer. and press ok
- at next screen type the wifi password to join the printer with wifi network


- Select Done and press Ok to confirm the details and select Proceed to save settings.
Now the Printer will exchange security details with the router and authenticate the connection. now the printer should be connected to the printer. Now you can go to the computer or phone to download the printer software or Epson app and install the printer and start printing.
Now let’s move further and check out other methods to connect Epson with wifi.
Login to the router and find out the wifi password if you are not sure.
Use Laptop to Connect Epson Printer to Wifi
- The first thing you do is to make sure the printer is installed with hardware such as an ink cartridge, paper, and power cable is plugged in and the printer is powered on.
- use the laptop for connection and make sure the laptop is connected to the wifi network.
- Go to the computer and open the web browser and go to epson official website to download the printer driver.


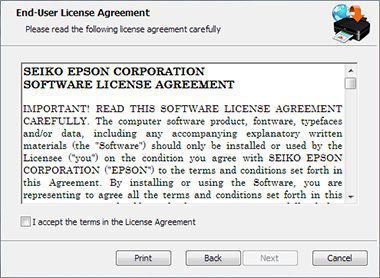
- run the downloaded application to install the driver. follow on-screen instructions to select the language, agree with the terms and give permission to install the driver.


- when asked for the printer setup option please select wireless Connection (Wifi Method) and click Next to move further.
- on the next screen, select setup printer for the first time and if you have used the manual way is given above to connect the printer with wifi then choose the other option that printer is already on my wireless network option.
- make sure the laptop is connected to the same wifi network where you want to connect the printer.
- on the next screen it will show a list or you might be prompted to use the wifi auto connect feature
- you can choose this option, allow firewall permission and when asked please insert the wifi password to connect the printer with wifi.


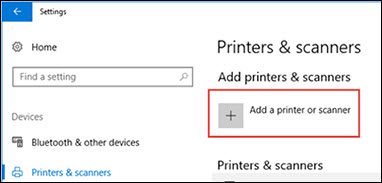
- Please add the printer to the computer when asked and print the test page to make sure setup is finished.
- you can exit the setup after its done and you should be good to go.
if the printer is not printing then perform the given troubleshooting method
WPS Method to connect Epson with wifi router


- make sure the printer is placed within the router range, Restart both devices on and let the boot settings.
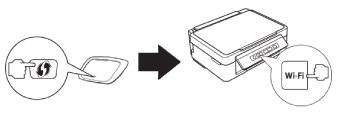
- go to the router and find the WPS key on the router and press it and hold for 5 seconds until the WPS lights start flashing
- the WPS mode will be enabled for 2 minutes windows and you must make the connection within 2 minutes.
- now go to the printer and press the wifi key (for 5-10) at the printer and hold it until the wifi light turns solid
your printer is not connected to the wifi router. Please add the printer to your computer and print a test page to make sure the connection is good for established.
One can use Epson Connect Printer Setup Utility to setup an Epson printer. if all the connection fails please reset Epson printer to default settings and begin the connection from the start as instructed.
we hope all this information was helpful. please contact support for any further help or comment below to let us know what more we can add to this guide.
