Hi there
Connecting the printer to the Wifi network is one of the most important parts while installing the printer. In this detailed guide, you will learn all Easy methods on how to Canon printer to wifi.
There are many benefits of using a wireless printer such as no messy cable connection, easy accessibility, and a remotely managed and configured setting. Once the canon printer is connected to a wireless network you will be able to print from any computer connected with the same wifi network.
Table Of Contents
- 1 Methods For Connecting Canon Printer to Wifi
- 2 How to Connect Canon Printer to Wifi
- 3 Download the Canon printer Driver
- 4 Add the Printer to Windows Computer
- 5 Canon Printer WPS Setup
- 6 WPS Push Method to Connect Canon Printer to Wifi
- 7 WPS Pin Method to Connect Canon Printer to Wifi
- 8 How to Print Canon Printer Settings Configuration
Methods For Connecting Canon Printer to Wifi
- WPS Method
- Wifi Connection Method (standard method)
- Using the Canon Printer App
This is where this gets complicated and confusing for many users so to explain to you we will compartmentalize the method into three parts.
First You Need to Connect the Printer to Wifi. For this, you can Use WPS Method or Manual Way to Connect the Printer to wifi. Then download the driver for the Printer and install it. In the last part add the printer to the computer and start Printing.
How to Connect Canon Printer to Wifi
Requirements For Wifi Connection to Printer
- Active Internet With Wifi Router/range extender
- Network name (SSID) Network Key (Wifi Passkey)
- Make sure the router and Printer is powered on and ready to connect
- Insert paper, ink cartridges and get them ready according to the manual that came with Printer.
There are 2 ways you can connect a printer under stander methods. One is to use the USB cable and one is to use the printer control panel. Let’s try the printer panel first-
- Press the Home Button on the printer control panel
- Use the navigation up and down keys and find WLAN Setup and press Ok
- By default, your printer might ask you to hit the WPS button on your router to connect the printer using the WPS method but for this method don’t do that
- If prompted such an option to use WPS please press the Stop/Reset button To manually connect to Wi-Fi (Recommended)
- Under the Wireless LAN Setup Please select the standard setup then press the ok button on the printer panel
- Now the printer will search for available networks within the range of the printer
- Use the up and down navigation arrows to select your wifi network and press ok
- Now on the next screen, you will be prompted to enter the wifi password of your wireless router network.
- Please insert the password using arrow keys to select the characters and Ok to confirm it.
- Password is case sensitive so press the center function button to switch between lower case, uppercase, and numeric characters.
- Once you have entered the password use the left function key to select done
- Now press the left function key one more time to end setup
- If your password was correct your canon printer should be connected to wifi network now
- Print a test page to make sure it’s connected.
For many users typing the password and navigation can be a trouble and for that reason, the connection might fail so here is one more easy way to connect the canon printer to wifi.
you can also use canon printer default password to login into the printer console.
Please follow the steps given below-
Download the Canon printer Driver
- Go to your computer and make sure it is connected to a wifi network and has the internet.
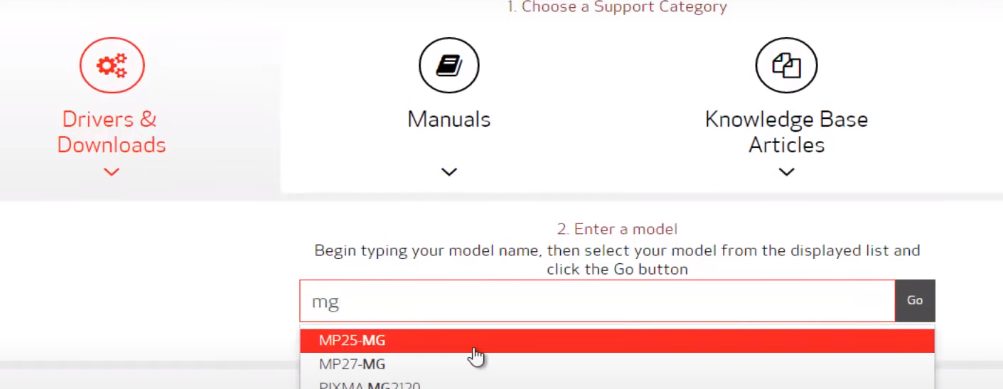
- Open the web browser and type https://www.usa.canon.com or go to Canon.com/ijsetup to download the Canon printer driver.


- Type the model number of the printer and run the application to open it

- Once the application will start running a pop-up window will open and ask you to select the language and click next to install
- Select your region and click next
- On the next screen Select yes to agree with the terms and conditions
- On the next screen, the printer may ask how you will like to setup it please select the wifi method where you can use the printer with a wireless LAN connection and click next
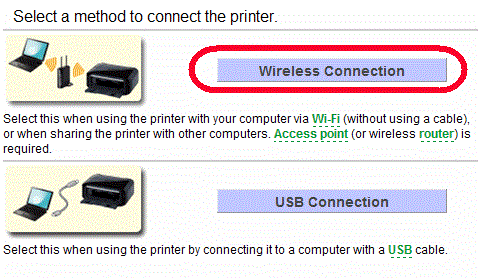

- Driver setup will search networks around you and present you with available wifi networks around you
- Please select your wifi network name and click next
- On next windows please type the wifi password and click next
- Follow the onscreen setup instruction to finish the printer setup and connection.
- Once the setup is Completed this printer should be added to the printer list on the computer so you can print now.
However, for any other computer within the network, you will have to add the printer manually to the computer before you can print it. know more about the Canon printer setup
Here is how to add the printer to the computer.
Add the Printer to Windows Computer

- Click on the start key at the left bottom and then click on settings Gear
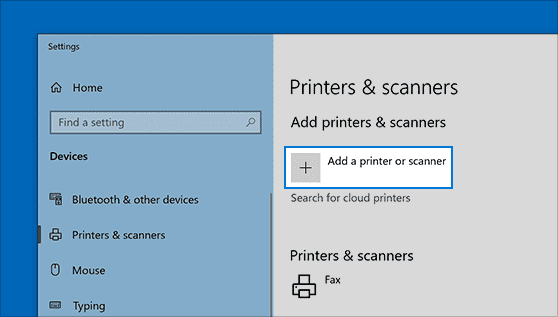
- Please Click on Device and on the left side click on Printers & scanners
- Click on Add a Printer or scanner now the computer will search Printers around you
- Make sure the Computer is within the wireless printer range or manually select the printer
- Select your printer and add it to the computer
Now there is a Quick Way around it if it’s too complicated for you
- Use the USB cable that came with the computer
- Connect it from the printer to the computer and let windows detect the printer and auto-add the printer to the list.
You can do the same for a Mac computer and you should be good to go.
Canon Printer WPS Setup
Note – while using the WPS Methods to connect the printer with the router you must make sure that your wifi router/extender is using WPA (Wifi Protected Access) Or WPA2 security protocol. These security protocols are secured and supported by all devices. Please login to your router and make sure of it.
you can find wps pin for printer to connect with the wifi
WPS Push Method to Connect Canon Printer to Wifi
This method would require you to have a printer and router with a WPS key enabled. Nowadays most printers and wifi routers come with a WPS button on them so just to make sure check both devices to make sure you have the WPS Key on them.
- Place the canon printer within the range of wifi network
- Turn it on and give it a minute to load printer settings.


- Go to The Printer and Press Home or Setup key to Go to the menu >network settings
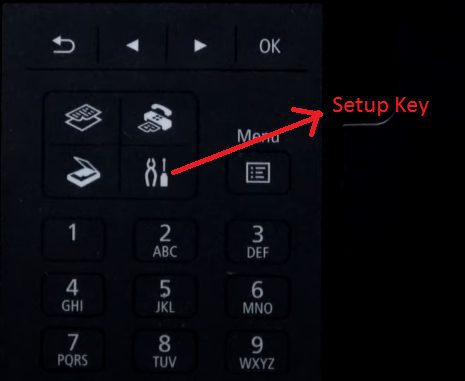

- Use the up and Down Keys to Locate WLAN and click Ok
- At the next screen please select Wireless LAN Setup and press the Ok Button
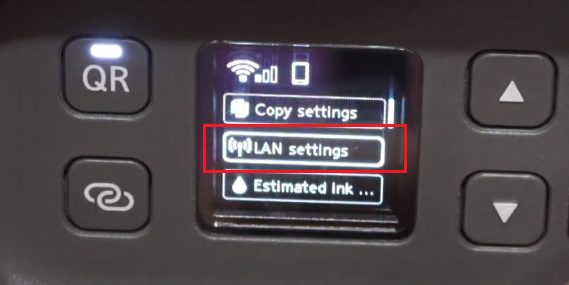

- Under wireless LAN setup you will see many options please use the navigation key to select WPS (Push Button method ) and press the OK key at the printer
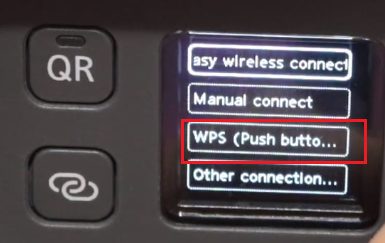

- Now once the WPS Push is Enabled on the Printer Go to Your wifi Router/Extender Press the WPS key and hold it for 8 seconds
- Now the blue light on the router will start flashing. You will have about 2 minutes to connect the printer to wifi.
- Once the printer is connected with the router it will show connected.
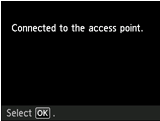

- On the Printer Press, the OK Key and Your Printer should be connected to the router.
do checkout steps on what to do when canon printer is offline and how to get it back online.
There is another way you can connect a canon printer to wifi please use the WPS Pin method to get it done please follow the steps-
WPS Pin Method to Connect Canon Printer to Wifi
This type of connection would require you to insert the WPS pin generated by the printer to the router, let’s find the WPS pin of the printer.
We strongly suggest you print the network configuration information where you would find many useful details to help you connect the printer to wifi.
- Turn on the Printer and make sure the router or access point is on. Place the printer within the range of wifi router.
- Go to the Printer control panel and press the menu key or setup key on the printer and press ok .
- Use navigation key to locate wifi setup and click ok
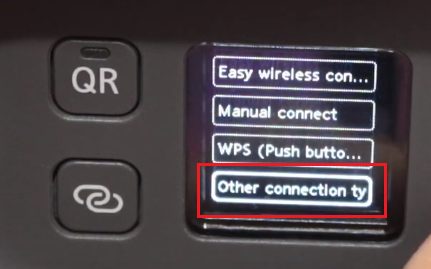

- Use the arrow navigation keys to select other connection types (Other setup) and click ok
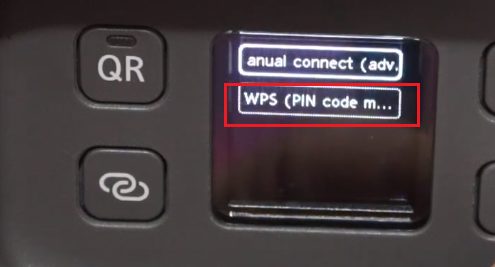

- Use the navigation keys until you find the WPS pin and press ok
- Now wait for a moment the printer will generate and please write it down or take a picture of it using a phone camera.


- Now log in to the router dashboard using default details.
- Once logged into the router please go to the router settings or advanced settings
- To find the option for WPS setup please click it and follow the on-screen instructions.
- Put the pin generated by the printer and click connect.
- Now the printer and router will talk to each other and sync the settings to connect the printer to wifi.
in the age of the latest tech devices, you are not dependent on the laptop or desktop because phones such as iPhones can also connect directly with wifi.
here is how you can connect canon printer to iphone using an ios app and simple steps.
You can use the print network configuration method to verify whether the printer is connected to the wireless network or not. Here is how you do it
How to Print Canon Printer Settings Configuration
- Please Insert the A4 size or later size plain paper to the paper tray feeder and keep it ready to print
- Press the menu key on the printer and use the navigation up and down key to select Setup then press ok
- Navigate to device settings then press ok
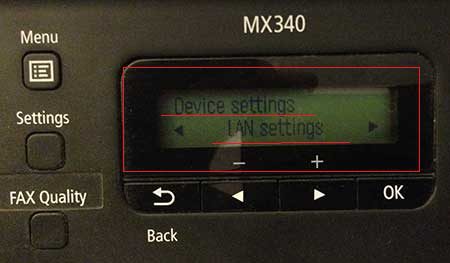

- Use the navigation up and down arrow button to select LAN settings then press ok
- Use the navigation key and select print LAN details and press ok
- Please use the arrow keys again to select yes and press ok
Your printer will print the default details. Please keep this information handy for you. There is another quick way to get the printer network configuration details please try this if you are not able to follow the steps provided above
- Make sure the printer is on and the paper is loaded
- Press the Resume/Cancel key and hold it for the next 10-15 seconds
The printer should print the network configuration details.
find more details and troubleshoot if the Canon printer is not printing after the setup. Please contact our support team for any further help or question regarding connecting the canon printer to wifi or leave a comment below for more insight on the topic.
