Hello Everyone,
Today We Will Guide you on How to Setup and Configure Trendnet Wireless Router In Just 5 Minutes Using this Quick and Simple Guide.
Dear Friends setting up any home wireless router is Easy and the Process is Almost the same In Every Other Home Wireless Router however there are some brand and model-specific settings that you must keep in mind while installing the trendnet router.
Table Of Contents
Requirements For Trendnet Router Setup
Before We Begin to setup trend net router We Would need a few things and information upfront like –
- You Need 2 Internet cables Often Called Ethernet Cable (If You have only 1 Cable That’s Fine )
- Internet Service Provider (Modem )
- Computer (Optional ) Or Any Device With Full Browser Like chrome, Mozilla, internet explorer, etc.
Now if you have these things let us Guide you on how to set up a trendnet router.
Find out what is the default Ip address (Default gateway ) of your router. Most of the time default gateway(IP) For the trendnet router is 192.168.10.1 But You Can Also check At The Back of your router for the default IP address.
Now we have everything we need to install the trend net router. Just follow these steps –
Setup Trendnet Router
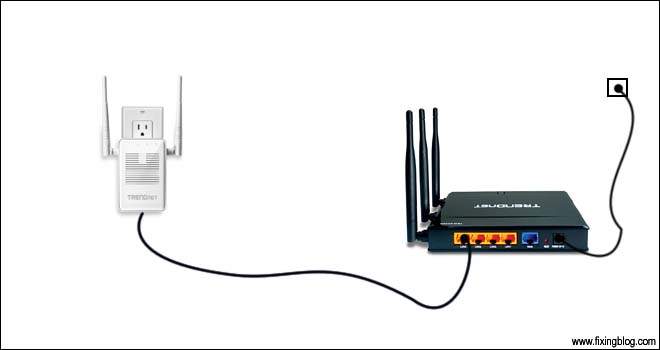
- Plug Your Router Into the power outlet.
- Connect your Modem to Your Trendnet router With Ethernet Cable from WAN Port.
- If You Have Extra Ethernet Cable Connect your router Lan Port With Computer.


- Now Open Your Browser And type 192.168.10.1 In the top Url box And Press Enter.
- It May Asks For a username and password Just Try These sets of username and password
| Username | Password |
| admin | admin |
| admin | password |
| user | admin |
| admin | 1234 |
| admin | (none) |
| none | (none) |
Once You Are Logged In To Your Router Settings We Have to set the Internet Connection Type. Like DHCP, PPPoE, Static Ip Etc
- Most of the routers Detect the Connection type on their Own And Most of the time Its a DHCP Connection But You Can Ask Your Internet Provider About Your connection type
Now Please Go to Network and click On Wan Settings And select DHCP And apply the settings Wait for 1 min and then We Need to setup the Network name (SSID) and Network Key (Wireless Password )
Setup Network name and password
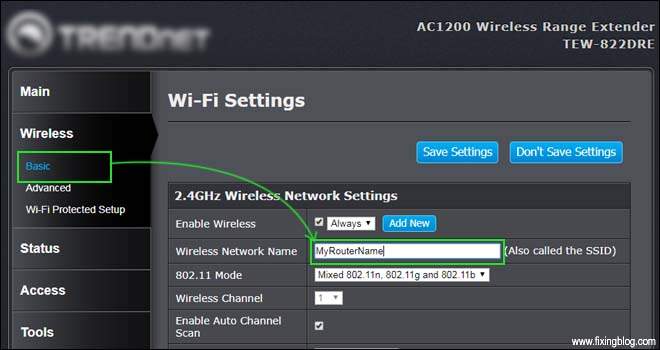
Click On Wireless Now go to Basic and here you can type your own network Name (wireless Name) you may wish for your Wi-Fi router.


- Now Apply the settings and go to the security, Please Type the new password as you may wish for your wireless.
- We Recommend You to select “WPA2-PSK” as the Encryption type (security Mode ) and make a complex Password at the Given Box for the Pre-Shared Key.
- After you type the password Please make sure you remember this password as you will need it to get on the internet.
- Now apply and save the settings then wait for 1 min and reset your router and restart your modem as well.
You Can try connecting with a wireless network using the password created. do check out an example in case you need help https://www.trendnet.com/emulators/TEW-751DR_V1.0R/wiz_freset.htm
Your Trendnet router has been configured and now you can use your Internet Using Any wireless device at home. We Hope This Is Helpful. Please comment below and let us know if you need any other help to Setup a trendnet router.
We thank You for reading at fixingblog.com
