If you have purchased a new Lexmark wireless printer, first you will need to set up the printer and connect it to the wireless network and we will assist you to do that. Please go through the following steps to set up your newly purchased Lexmark printer on the wireless network.
For Connecting your Lexmark printer to Wi-Fi network In order to set up wireless printing, Please perform these steps:
Table Of Contents
Prepare the lexmark Printer for Setup
- Before you go ahead and install your printer on a network, please ensure that your wireless network is configured properly and functioning well.
- The PC, laptop, or any devices on which you will be using to print, ensure that it is connected to the same wireless network to which you will be connecting your printer.
- Where you want to place your printer, connect the power cable to the back of the printer, and to the properly grounded wall socket.


- Now, switch the printer “on” after plugging the power cable into the printer.
- Make sure that the computer and your Lexmark printer is completely turned “on” and in a “ready” state.
- Do not plug in the USB cable and connect the cable from the printer to the computer until guided to do so on the computer screen.
- Now, plug the CD into the CD/ DVD ROM tray and install the printer software, drivers, and documentation.
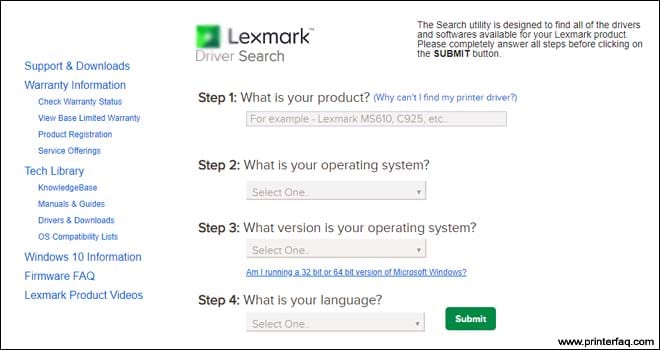
- In case, if you don’t have the CD, you can download the latest printer drivers and software from the official Lexmark website by inputting your printer model number in the search box under the printer support section.


- Open the printer software and drivers and install the application.
Connect Lexmark Printer to Wifi
- Click on “install” and follow the onscreen instructions that appear on the computer screen while installing the software.
- Choose the option” wireless connection” when the connection type appears on the screen.
12- When you see the screen that says “wireless configuration”, click on guided setup.
13- After that, you need to connect the USB cable between the printer and the computer on a temporary basis.
14- Please make sure you are not connected with the Ethernet cable from the computer and the printer while setting up the printer on a wireless network.
15- Now, prepare to connect the printer to wifi printing.
How to Locate the printer’s MAC address
1- In the Menu option, go to “reports” and select “Network setup page”.
2- In the Network summary, try to find the standard network card and then look for the MAC address.
3- If you are using a Mac computer, you need to click on the finder.
4- Go to system preferences, then click on network and Airport.
5- Open a web browser like “safari” or “Chrome”.
6- Select Bonjour under collections and double click on the printer.
7-Type in the network name and select infrastructure as the network mode.
8-Select the network security type you want to use.
9-Enter the network security key to connect your printer to the wireless network.
10- Hit “submit”
find more information on Lexmark printer wifi setup for easy setup and configuration.
Add the Lexmark printer to Computer
- Click on system preferences, and then click on Print and Fax.
- Enter the IP address of the printer in the address bar and click “Add”.
- In case, if you are using a Windows computer, click on the control panel and then go to the “printer and devices” option
- Click on “Add printer”
- Click on “search automatically for available network devices”.
- A list will appear with the model name of the printer, you need to click on that and click add this printer.
After following the onscreen instructions on the computer, your printer will be successfully added to the computer. You can now go ahead and try to print some documents. In Case if Your Printer is Offline Please Uninstall it & reconfigure it.
