Hi there, connecting hp printer to wifi is the most effective and important part of the hp printer setup. in this quick and detailed guide learn how to connect an hp printer to wifi and later install the printer in case of connection failed to try other methods
there are multiple methods to connect hp printer to wifi such as-
- Manual Method
- WPS Push Method
- WPS pin method
- Using the Printer Driver
Table Of Contents
How to Manually Connect Hp Deskjet Printer to Wifi
in this method, you don’t need the computer until you are done making the connection and required to download the software. please follow the guide step by step for a successful connection.
- unbox the printer and connect the power cables as instructed
- make sure you plug the printer with wifi range and place the paper and ink cartridges carefully
- turn on the printer from the power outlet and turn it on using the power key on the printer panel
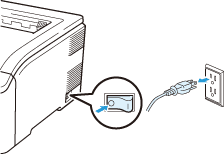

- make sure the Wifi router or Extender is turned on and working
- Go to the printer and from the printer panel touchscreen press the Home key or Setup Key to access the main menu depending on your printer model


- Now use the navigation arrows up and down to find Network Settings
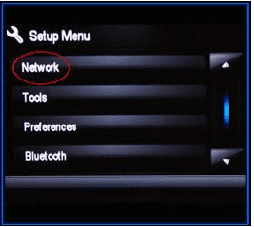

- under Network Settings Menu find the wireless setup wizard and click on it to access it
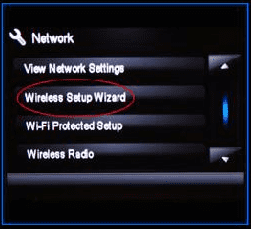

- now your printer will auto-search the wifi networks around you and present you with a list
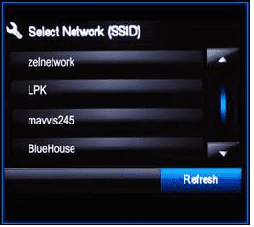

- Please select your wifi router using the navigation keys and tap on it to select it
- Now it will require a password to connect the printer to wifi, Please type your wifi password and press done.
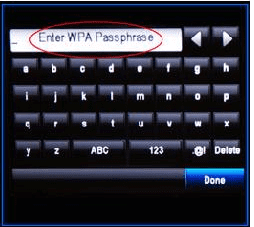

- do remember password is case sensitive and use the printer panel to insert the password.
- in the next steps please press Ok to Confirm the settings and now the printer and wifi network will verify the security protocol and password to connect with each other.
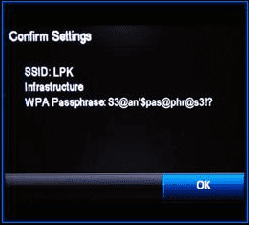

- Now your hp printer should be connected to the wifi network.
if you think it’s not the easy method for you here is a Quicker and much Simpler method for you to connect the hp printer to wifi.
WPS Push Method to Connect Hp Printer to Wifi
Most Printers, Routers, and Range Extenders are WPS Enabled these days, and the reason we did not tell you this method in starting is that this will require your router to have a Physical WPS Key on the wifi router.
for example, if you have a Netgear router then find the WPS button on the router and then follow the steps.
- Plug the Printer into power within the wifi range of the router and do prepare for setup as explained above
- now go to the printer Panel Press the menu or the Setup key with the wifi symbol on it and hold it for 2 seconds.
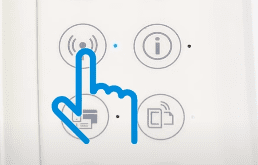

- select network settings and under the network menu please select Wi-Fi Protected Setup
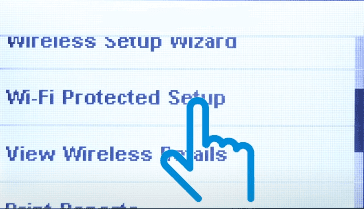

- under Wi-Fi Protected setup Please touch the option that says Push Button
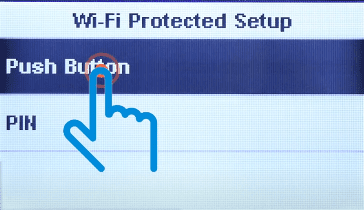

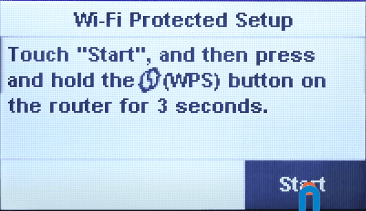
- in the next step touch Start and once you have done it the printer WPS mode is enabled
- Now you have 2 minutes of windows for you to connect hp printer to the router please go to the router.

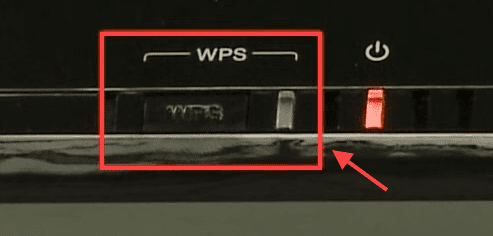
- Press the WPS key on the router and hold it for 5 seconds and you will see the WPS light flashing
- once the connection is made the WPS light on the router will turn solid.

there is one more method for you to try in case you need help just find WPS pin for hp printer and get started.
Now you can start the hp printer setup by downloading the software from the official hp printer website
for the printer driver go to https://123.hp.com/us/en/devices/setup to download the hp printer easy start. this will help you manage printer settings, register the product for warranty and install the driver.
you can also manually connect the printer to windows and mac computers and start Printing.
How to Connect Hp Deskjet Printer to Windows Computer?
Go to your Computer And make sure the printer is powered on. you can use the printer driver or USB cable that came with the printer to connect the computer with the printer.
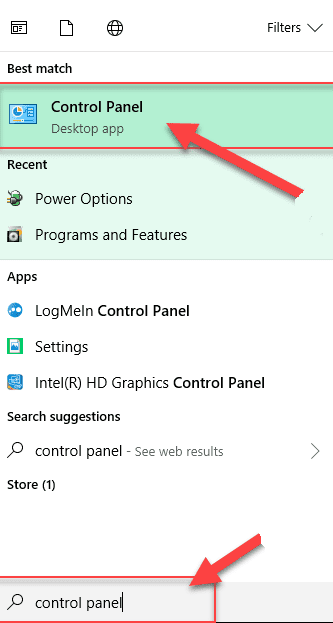
- Click on the start button at the left bottom of the computer.
- type control panel in the search box then click on the control panel to open it

- On Next page Select Hardware And Sound then select devices and Printers
- On next page click on add a printer and let the computer search for available printers around
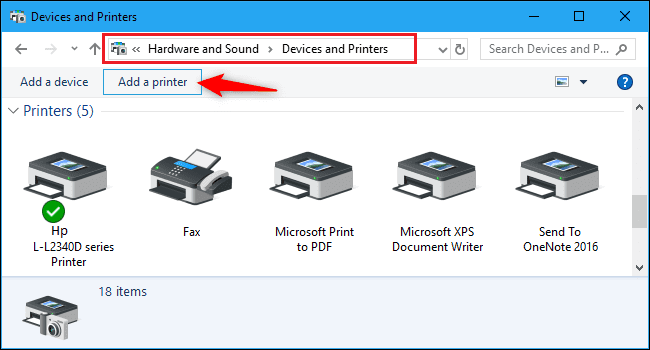

- once you see your hp printer in the list please select your printer and click Next
- follow the onscreen instructions to finish the setup and now the printer is connected to the computer.
you can also use the wifi direct feature from the printer panel to connect the computer to the printer.
in case you have a mac laptop please use the steps given below-
How to Connect Hp Deskjet printer to Mac Computer?
- use USB Cable or wifi means to connect hp printer to the computer
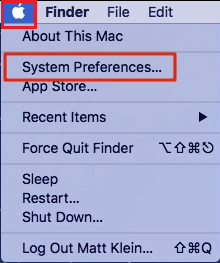
- Click on the apple icon menu at the top of the screen and then select system preference

- now locate and click on Printers & scanners to open printer settings
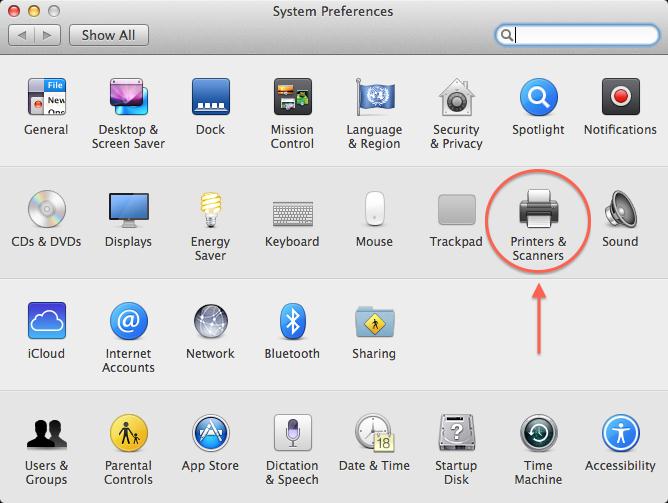

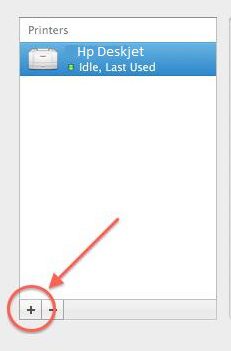
- Click on + Icon to add a printer and then select your hp printer and follow the instruction to finish adding the printer to your mac computer

we thank you for reading our post please comment below and let us know if you need any help on how to connect hp printer to wifi and add the printer to the computer.
Good luck

