The Internet has become one of the most essential parts of our daily life. Most of the people who perform all their tasks with the help of the internet require huge amounts of data to access their required resources on the internet. That is where wi-fi comes into the picture as it provides the user with an unlimited amount of internet at very high speeds.
In reality, a wi-fi router is installed in our homes or offices where there are many obstacles, such as walls, fridges, TVs, are in between the user and the wi-fi system. This causes the range of wi-fi routers to fall to 10% of the claimed range. This is where the TP-link extender comes into the picture. It acts as an extender of the wi-fi router as it receives the radio waves from the wi-fi router and then releases it similar to the wi-fi router itself.
if you have an older tplink extender that you would like reconfigure please reset the TP-Link extender to default settings and start from here.
Table Of Contents
setup tplink extender with ethernet cable?
Due to the TP-link extender working similar to your wi-fi router, certain steps have to be properly taken for setting it up. If you want to connect your computer with the TP-link extender to get the most speed, then the best way would be to connect both of them using an ethernet cable. An ethernet cable is also a compulsion for connecting your computer with the TP-link extender by programming the wireless settings. the method by which you can configure the wireless settings by connecting your computer to your TP-link extender using an ethernet cable is as below:


- Start by plugging your TP-link extender to a wall outlet of the place that you’re in.
- Connect your computer and the TP-link extender with the help of an ethernet cable.
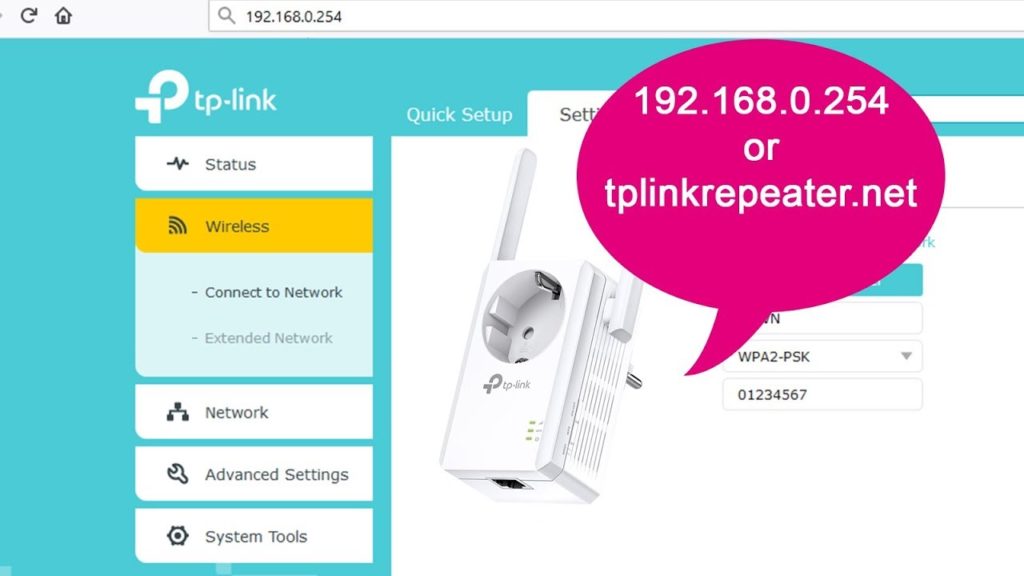
- To get on the TP-link web page, type in http://tplinkrepeater.net/ on the browser of your computer. In case this doesn’t work, then try typing in http://192.168.0.254/.
- You should click on the Quick setup option that will be visible on the display and then click on Next.
- Then look through the options in the region section, and select your region. Then click on Next.
- Then let your TP-link extender take a minute or two for scanning for wireless networks around it.
- Look for the name of your wireless network in that list and click on it and then select Next.
- Then the prompt would appear, asking for the password for your wireless network. Put your password on it.
- Now you’ll have two options, depending on whether you want a single wireless network or you want a different network to be formed. Select ‘copy from the main router’ for the first condition and select ‘customize’ for the second condition.
- Click on Next.
- Check out all the network settings in the final window that is opened and if all of it is correct for you, then click on Finish.
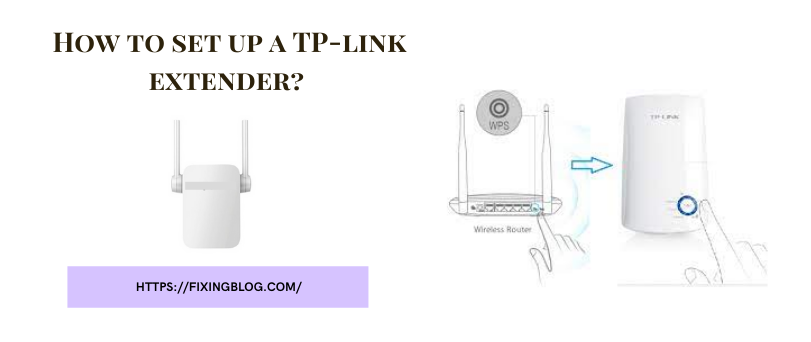
Your TP-link extender can also be set up using the WPS button in the back of your wi-fi router. Some TP-link extenders also have a WPS button on their back which could be used for their configuration. The method to do that is given below:


- Plugin your TP-link extender to a power source that is near your wireless router.
- Click on the WPS button that is located on your router’s back. It should signify that it is pressed with a LED light blink. If you don’t see it, then press it again.
- Follow it by clicking on the WPS button that is situated on the back of your TP-link extender’s back. It should also signify its activation with LED blink.
Wrapping up
TP-link extender is a great tool for extending the reach of our wi-fi to get a stable wi-fi connection all-around your home. TP-link extenders are also quite easy to set up and do not require many sophisticated procedures to be followed. This makes it a tool that is easy to use for anyone.

